
The Basics of Log Cabin Restoration
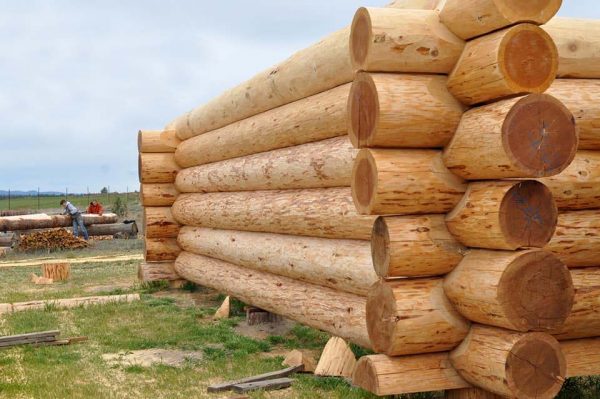
The log cabin restoration involves removing old finishes, cleaning the wood, and repairing any areas of rot. Then, the house is re-stained, re-chinked and re-sealed.
Annual inspections are important to catch small problems like mold, mildew and discoloration of the wood before they get worse. A professional inspector should look for; large cracks and checks, moisture damage, sagging gutters and splash back from sprinklers.
Stripping
Stripping a log cabin is an important step before any refinishing. It removes the old stain and paint to allow new products to bond properly to the wood. It also exposes any damage or rot that has developed in the logs and allows the homeowner to make repair decisions.
This step is a messy job that should be done by professionals. It requires the use of long ladders and possibly scaffolding for access to higher parts of the home. It can also be very dusty. Many people choose to use a chemical stripper such as Smart Strip which is safe, environmentally friendly and works well on most finishes.
Another method that can be used is blasting. This can be a very effective and efficient way to strip your log cabin but requires some knowledge and the proper equipment. Using a Blaster Buddy is a great choice as it uses crushed glass or walnut shells to abrade the finish from the logs rather than sand. This is a much more gentle approach that does not impregnate the logs with organic material that can later mold or attract insects. It also does not leave as much debris to clean up afterwards.
Sand can be used as a blasting medium but it is not as gentle and tends to leave sharp edges on the logs that could result in mold or other moisture problems. Corn cob grit is also an organic option but can lodge into the cracks of the logs and cause problems with moisture. Crushed glass is an excellent blasting medium as it is inexpensive, efficient and very mild. It is a great alternative to sand and does not leave sharp edges.
Whether the log home needs to be stripped is based on a few things: How faded the previous stain is, how much weather damage or rot has developed and whether or not it is time to renew the wood preservatives (mildew, fungal and mold inhibitors). In most cases a good cleaning and fresh stain will suffice.
It is very important to note that refinishing with latex is the worst thing a log home owner can do. This will cause the logs to swell and lock moisture into the home causing rapid decay and other negative affects. A good stain will improve water repellency as well as add UV protection and mildew inhibitors.
Cleaning
Log cabins are a beautiful way to live in the mountains, but they’re also prone to mold, mildew and pests. Many of these problems occur because the home isn’t cleaned regularly or because the wood is not properly protected. A thorough cleaning and application of a protective stain are important first steps to making sure that these issues don’t go out of control.
To clean your log cabin, you’ll need a few simple tools and cleaning supplies. First, you’ll need a hose with a mist setting and a bucket to mix your cleaner in. A rag or sponge is also helpful for scrubbing the walls. A brush is a good choice for reaching corners and crevices. If you have a pressure washer, use it with a proper nozzle and a low pressure setting. Overuse of a pressure washer can force water through the logs and cause damage.
Start by looking at the structure of your cabin and noticing any visible damage, such as loose or missing logs or cracked chinking. Make a list of any problems that need to be addressed. Next, walk around your cabin and examine the wood, especially in the dormers, which are often overlooked. Check for a darkening of the wood, which can indicate mold or rot. Also, look for large cracks or “checks” that collect dirt and rain. These should be caulked with a good-quality caulking material.
Once your home is cleaned and the cracks have been filled, you’ll be ready to apply a stain. Before you do, make sure that the logs are dry and the stain is in good condition. If your stain is looking dull or faded, it’s time to reapply Lifeline or Transformation Stain Log & Timber.
Be sure to mask off areas around windows and doors before spraying. A good rule of thumb is to use a light flood coat and then follow up with a thicker brushing, as this will help the stain penetrate the logs better and prevent it from peeling or flaking in the future. The stain should be brushed with a soft, 0000 steel wool pad and not a wire brush to avoid damaging the wood.
Repairing
The next steps in a good log cabin restoration are repairing and staining. This is where a lot of problems start to develop in log homes that have been neglected for years and can often be prevented with a little care.
Whether you are restoring an older log home or building a new log home, a thorough inspection should be made. This includes looking for signs of rot or decay as well as examining the condition of the chinking and backer bars. It is important to determine if the rot is in a section of the log or if it is the whole log that needs replacement.
If a section of the log is rotted, a professional should be called to determine how bad the damage is and if it can be repaired. Sometimes this can be done by cutting out the rotted area and replacing it with a new piece of wood. This is a more technical job and may be left to professionals with many years of log home experience.
A common issue that should be addressed is mold and mildew growth on the logs. This is usually caused by the lack of proper ventilation and water drainage in the logs and should be treated with a combination of bleach and TSP. If the mold is allowed to spread, it can lead to rot as well as a host of other issues such as insect and rodent damage.
Other repair jobs to consider include re-chinking and resealing. Often, the chinking and backer bars will have pulled away from the logs due to lack of maintenance and settling. These should be re-caulked with a flexible wood caulking sealant that will allow for expansion and contraction of the logs. Gaps between logs should also be filled in with a penetrating wood epoxy that will soak into the soft wood and encapsulate it.
If the logs are in good shape but the stain is worn or discolored, it can be restored using a water-based latex or oil-based stain like those from Sashco or Perma-Chink. Before applying a new stain, it is important to make sure the logs are cleaned thoroughly and dried. Stain should not be applied to damp logs or it will be trapped inside and cause further deterioration.
Staining
After all of the hard work of prep is done it's time to stain the logs. This is one of the most rewarding parts of the job. Once again, a good choice of stain will have a huge impact on how long it lasts. The best way to choose the right stain for your home is to talk to Richardson Log Homes LLC that both builds and stains cabins. They will have the best knowledge about what works in your area. Another option is to go to a paint and stain store that carries the industry's top stain products engineered specifically for log and wood homes. The clerks will also be able to help you choose the stain that is right for your home.
Before staining it's important to check all areas of the cabin for chinking and caulking that needs to be replaced. Also, it's a good idea to replace loose or damaged log ends. If left unchecked, they will eventually fall off the log and leave it exposed to weather damage. It's also a good idea to inspect all of the gutters for any clogs that could be causing water to run over and splash down the sides of your log home, resulting in moisture conditions that can lead to mold, mildew or rot.
After the log cabin restoration and sanded they should be media blasted to expose a fresh surface that is ready for stain. This step will remove all dirt and debris that has accumulated on the logs over time as well as any remaining chinking or caulk. A blaster with a fine media is ideal as it will not tear up the soft wood or raise the hairs of the grain.
During this process the logs should be down to 19% moisture content before staining. Any higher and the stain will quickly release when the sun hits it resulting in blistering or peeling.
When staining a log home interior it is a good idea to have a helper. Having one person spray and the other brush out the stain will ensure an even coat without missed spots. It's also helpful to stain one wall at a time so you can keep track of what has been sprayed and which areas have yet to be brushed.
The log cabin restoration involves removing old finishes, cleaning the wood, and repairing any areas of rot. Then, the house is re-stained, re-chinked and re-sealed. Annual inspections are important to catch small problems like mold, mildew and discoloration of the wood before they get worse. A professional inspector should look for; large cracks and checks,…